Hugo & AWS Amplify: hosting a simple blog with CI/CD (2 of 2)
Part 2: How I launched this blog in minutes using Hugo and AWS Amplify

This post is part 2 and describes how I set up this blog using Hugo on AWS. If you are interested in why I decided to use Hugo, see part 1.
The setup
Once I knew I was going to be using Hugo, it was time to start building. First order of business was to get Hugo running locally.
Hugo
I already had Homebrew installed on my Mac so this part was simple:
brew install hugo
Once that was done, I initialized the site in the parent directory where I keep all my GitHub projects. I let Hugo create the directory and added it to GitHub later:
hugo new site jimcatts.com
I then chose a theme from this list.
Pro-tip: Take some time and demo the theme. Try it on mobile. Go to the GitHub repo and check what issues people are having with it. See how long it takes to get them resolved. See if you can contribute to the project should you have to fix something yourself. See if there’s good documentation on how to install & configure the theme. See if there are enough configuration options for your liking. I did not do any of this with my first theme and had to uninstall it and start the configuration process over.
I installed the theme into the themes directory:
mkdir ~/jimcatts.com/themes
cd ~/jimcatts.com/themes
git submodule add https://github.com/pacollins/hugo-future-imperfect-slim.git
You might have heeded the advice above, but just in case you’re like me and nodded your head then did it the hard way anyway, here’s how I uninstalled my first theme.
How you configure the theme is dependent on the theme itself. Most templates tell you to copy the sample config to the site root like:
cp ~/jimcatts.com/themes/hugo-future-imperfect-slim/exampleSite/config.toml ~/jimcatts.com/config.toml
Now start up the Hugo development server:
cd ~/jimcatts.com
hugo server -D
It will tell you that you can browse your site at http://localhost:1313/. Now you can edit the file at ~/jimcatts.com/config.toml and see how it impacts your site in real-time in your browser.
Once you’re happy with your theme, you can create a new post with:
hugo new blog/building-a-blog-1.md
Before you start authoring, I’d recommend creating a new GitHub repo, committing everything to master, and getting an AWS Amplify project going. It can take a little while to provision.
AWS Route53
This particular domain had languished over at GoDaddy since Route53 was just a glint in Werner’s eye. First, I needed to transfer it over to AWS by:
- Confirming my administrative contact e-mail address at GoDaddy.
- Creating a new hosted zone in Route53 and copied over all appropriate DNS entries. It’s important to remember to do this before transferring.
- Transferring the domain over to AWS using these instructions and indicating that the hosted zone already exists.
By approving all the e-mails as soon as they came through, this whole process was done in well under an hour - faster than I expected.
AWS Amplify
For most of the projects I work on, I’d build a CloudFormation template to provision any resources. But in this case I used AWS Amplify - it made it so simple to get the site and a CI/CD pipeline running. As a bonus, it also natively handles redirects in subfolders to the index.html page so jimcatts.com/blog/ will redirect to jimcatts.com/blog/index.html. Most Hugo templates would require that behavior to work properly.
If we were setting this up ourselves with a CloudFront distribution, we’d use a Lambda@Edge function or this stack from the Serverless Application Repository 🔥 to achieve this.
In the AWS Console under AWS Amplify, select All apps, then Connect app.
Select your source control provider - I’m using GitHub.
Authorize AWS Amplify to access your repository and start with the master branch.
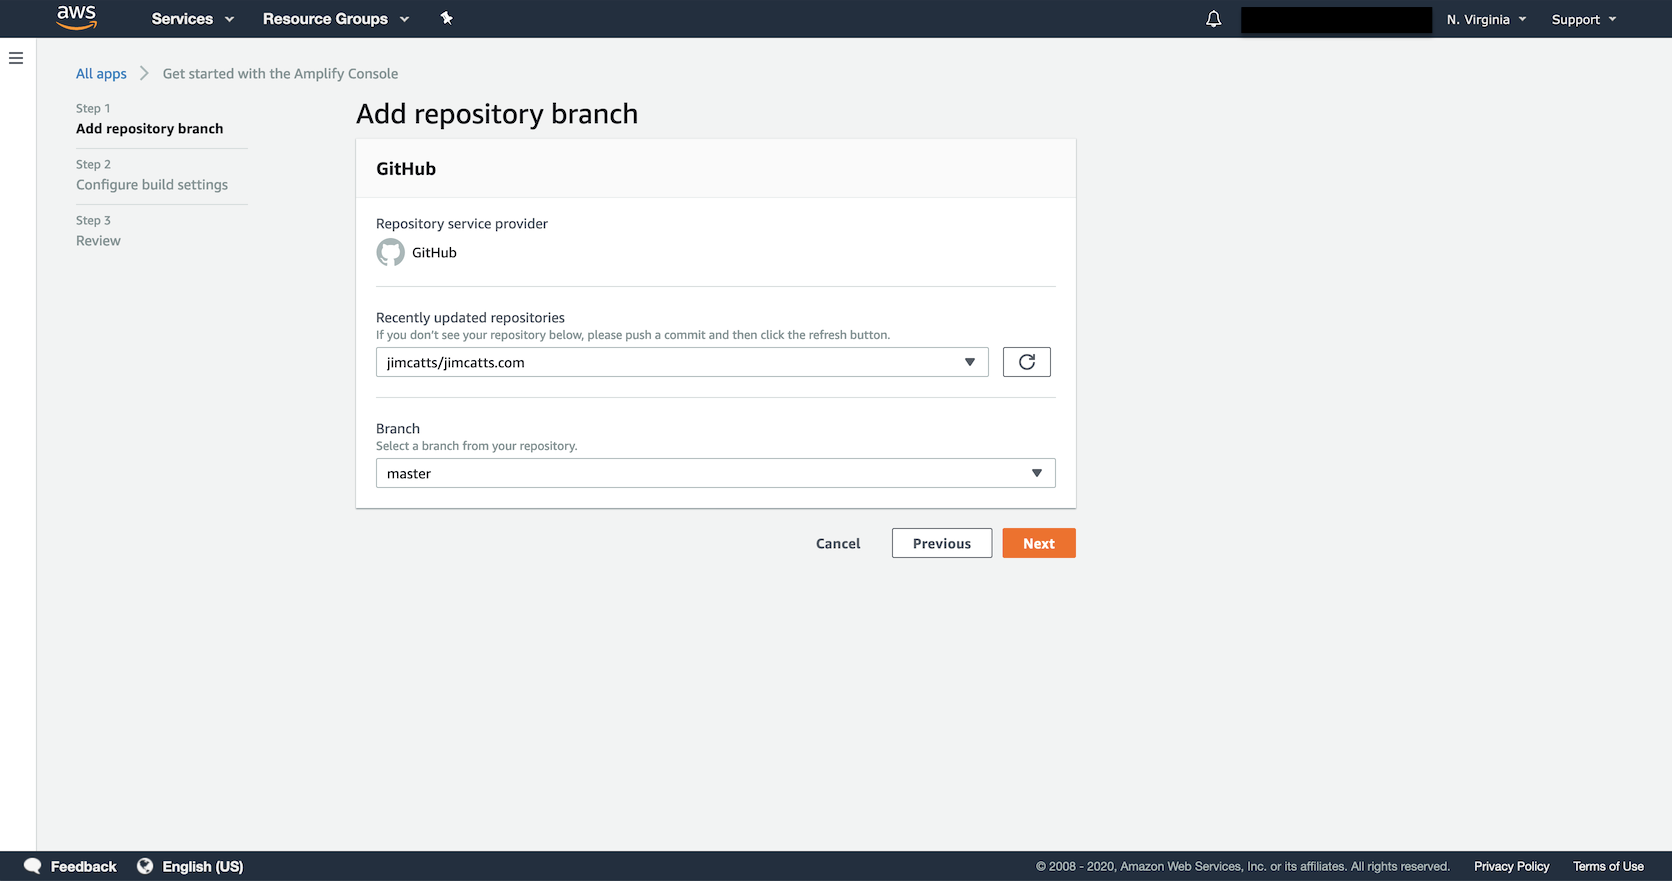
Amplify should detect that this is a site built with Hugo.

All default settings should be fine.
Domain
With the first build deploying, you can now set up the Domain and SSL Certificate:
In your new Amplify app navigate to Domain management.
The autogenerated Amplify domain will be listed. But we want to add a custom domain so select Add domain.
Enter your custom domain, then select Configure domain.

Again, defaults should be fine here.
And viola: zero to blog in about the runtime of a movie but for less 💵 and with no 💻 to manage. Now you can add or modify posts and as you commit to GitHub, Amplify will automatically detect the changes and deploy them to your blog.
If you want more advanced behavior such as feature branches, password-protected previews, and pull requests, the Amplify console will walk your through setting them up.
Photo by Christopher Burns on Unsplash